Showing posts with label Kitchen Gear. Show all posts

Friday, February 22, 2019

Can Openers and #10 Cans

Most of us have some dehydrated food in #10 cans. Swing-Away can openers I feel are the best and easiest can openers to use for opening #10 cans.  However, at my age and with the onset of arthritis, especially in my hands, easy can opening is important.

Last week I discovered and ordered the “Swing Away Easy Crank” can opener for my #10 cans. The ‘easy crank’ means it is much larger overall than their standard swing away can opener. The ‘Easy Crank’ model incorporates a 3½ inch long crank handle for more leverage and longer overall handles for better control. The larger crank handle makes opening a #10 can a lot easier for me.


The new opener.


Opener on a #10 can.

Link to buy:
https://www.walmart.com/ip/Crank-Can-Opener-Swing-Away/35707642


Tuesday, July 24, 2018

Burger Pattie Forming Press

I purchased this hamburger press last week and tested it today.


I have been on the Atkins Diet, or what I like to call it, the Atkins Eating Plan and not a diet, that’s based on meat and veggies. It is very easy to follow with a wide latitude of what you can eat and what you shouldn’t, and one of the should not’s is most everything made with flour. The one common thing about any eating plan is ‘portion control’. When it comes to eating protein (meats and fish), Atkins recommends 3 ounces per dinner meal. 3 ounces is a little less than a quarter pounder burger patty. That’s pretty minimal for me, so I eat portion sizes between 4 or 5 ounces per dinner meal and feel very satisfied plus there are ‘0’ carbs in meat and fish so the extra amount does not impact my weight loss, about 10 pounds per month.

As I wrote, portion control is important, especially for the ‘Prepper’ so I weigh the food before I eat it. I like to have the food pre-portioned whenever practical such as hamburger patties and is the reason I purchased this burger patty press.

The press has a fully adjustable patty thickness so I can control the thickness of the patty being formed controlled by the weight of the meat to be shaped. As in my case, 5oz each, are made quickly and repeatable. The diameter is fixed at 4½ inches. I buy meat such as a pork ‘Boston Butt’ the cheapest meat you can buy and when on sale it’s about $1.80 a pound today but not long ago it was $1.20 a pound. I buy up to 20 pounds at a time. 20 pounds of 5-ounce patties is about 60 burgers. That’s a job to hand form 60 patties at one time, and that is the reason for purchasing this press.

Since I grind the meat at home I can season it the way I like when grinding and I also grind the pork for sausage patties for use on pizza’s, just crumble up a patty or 2 and top the pizza with it, or for breakfast sausage. No I don’t eat pizza while on Atkins. L

Summary:
If you are a Prepper and hunt and grind much of the animal or you butcher your own livestock and grind it this is a valuable tool to eliminate waste (portion control) and will speed the process.
Overall it’s a good, strong product, very easy to use and I expect it to last longer than myself!

Manufacturers Statements:
  • There’s a reason (well, many reasons, really) people rave about this Burger Press: A solid metal construction, non-stick coating, adjustable patty weight and thickness, and an exclusive spring plunger button that makes patty removal super simple!

Features:
  • Spring plunger button compacts the patty then pops back for quick patty removal
  • Non-stick
  • Constructed of heavy duty aluminum
  • Wipes clean
  • Adjustable patty thickness from ¼” to 1 ½” with a 4 ½” diameter
  • Helps ensure that patties will not fall apart on the grill
  • Not just for hamburgers – make sausage patties, turkey burgers, and crab cakes too

How to use video:

Link to purchase $18 - $29

My trusty money saving scale.

The test hamburger.

I tear off chunks of the ground meat and add to the scale until I have 5 oz measured.

The 5 oz portioned meat is quickly shaped into a rough ball.

A piece of parchment paper is first put into the machine with a ball of meat.

Another piece of parchment paper placed on top.

Close the press all the way and open again.

Out comes the patty. Using parchment paper saves a mess.

Perfect and portion controlled patty.

Ready to be vacuum bagged and put in the freezer.


Tuesday, May 22, 2018

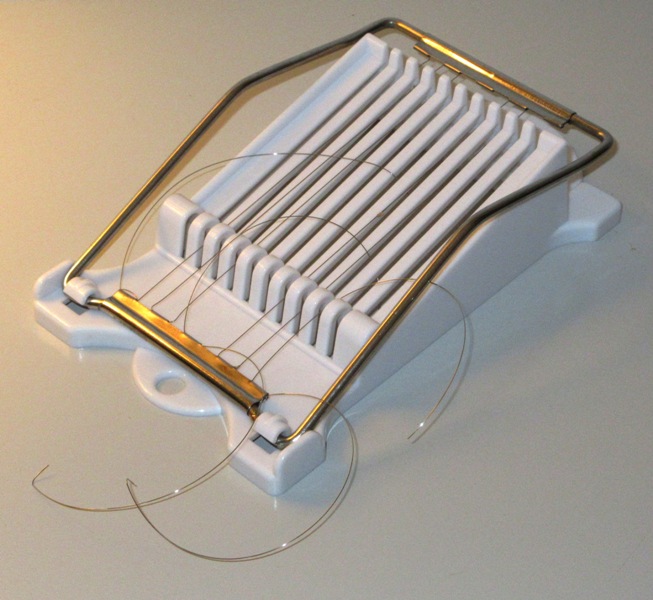
SPAM Slicer Fail


I purchased and tested this SPAM Slicer a few weeks ago, everything worked fine and the overall quality appeared very good. So I posted it for those who like SPAM and wanted a simple way to slice and control portion sizes.

Three days ago I went to slice some more SPAM and five (5) cutting wires broke before passing all the way through the SPAM. I didn’t force it and used the same pressure as before.


If you’re thinking about buying one of these,,, Don’t.


Saturday, June 17, 2017

Pasta Machine, The Marcato Atlas Wellness 150

The machine arrived! And the quality is far better than I expected.


My very first attempt using the machine was easy and I had no difficulty at all. Here’s a single serving recipe rolled out and ready to cut using the machine.


Here’s the Fettuccini cut from the single serving recipe not cooked yet.


The Fettuccini yield cooked.


The spaghetti cut from the single serving recipe not cooked yet.


The spaghetti yield cooked.
(When making this dough it was a little dry. I suspect I didn’t measure the flour accurately and needed to add a little water. I added 1 tbs of water but should have added 1 tsp as stated in the recipe. Then it came out wet and had to add 3 tbs more flour to get the dough right. This is why there is more than the fettuccini serving.)


[Blogger is giving me fits with the line spacing, don't know why]

I have been making fresh pasta for several years using a rolling pin to roll to the proper thickness and a wood framed banjo wire type cutter to cut the rolled-out pasta to shape or size, this works but the rolled thickness is difficult to be consistent. I’ve been looking forward to the Marcato machine as it will be a lot easier and be produce a uniform dough thickness rather than hand rolling with a rolling pin. I make the dough using a food processor as this is a very quick way to make the dough! It still amazes me how fast the processor works.


This Marcato’s Original World-Famous Atlas Pasta Machine rolls and cuts pasta dough for making traditional lasagna, fettuccine, ravioli and spaghetti at home.

Is this a Prepper Machine?
Maybe, providing your disaster prep’s are nearing completion or you simply love fresh pasta to feed your family and friends. It’s especially useful as a prep tool if you have an alternative power source to power a food processor. I do have a small 200 watt solar system that easily handles the few seconds of power for the food processor. And yes, it is easy to make the dough by hand I know because that’s the way I used to make it, but the processor is lightening fast and very consistent.

Also, instead of stocking dry pasta long term, all you would need is to stock All Purpose white flour and make all the fresh pasta you could ever want providing you have eggs, however powdered eggs also work fine.

A 25lb bag of All Purpose flour fills perfectly a 5 gallon bucket. From this bucket you can produce 121 almost 2 cup servings of fresh cooked pasta.

Another note; it only take about 2 minutes to cook fresh pasta so be ready to cook it very quickly as compared to dry pasta.

Also, there are many knock-offs of this original premium Italian made machine. They are not worth your money, even though they are $20.00+ less. Buy the Italian made machine. This Marcato machine is a work of manufacturing art and is warranted for 10 years.


The Pasta Recipe I Use:
This is just too easy not to make.

Ingredients for almost a 2 cups cooked:
1 egg
2/3 cup flour

Directions:
Use a food processor if possible because it’s the easiest.
Add all the flour, then Pulse to aerate the flour.
Then add the slightly beaten egg/eggs.
Turn on and mix the dough for about 30 seconds.
If wet and sticky add a tablespoon at a time of flour.
If dry and crumbly add a teaspoon at a time of water.

Remove the dough from the processor, be careful of the sharp blade.

Knead the dough by hand until smooth, about 3-5 minutes.

Wrap dough ball in plastic then let the dough rest for about 15 minutes before you begin rolling it out.

Divide the dough into 2 pieces. Roll the dough thinner and thinner, progressing from ‘zero’  machine setting to the #5 for fettuccini or #7 for spaghetti, one step at a time.

Cut the dough sheet length in half then use the machine cut either Spaghetti or Fettuccine.

To cook the noodles, just boil them in salted water for about two minutes. They cook lightning fast, so don’t let them cook too long.

Important if making a lot of pasta: To keep the pasta dough or freshly cut dough from drying out, always keep it under a damp towel. The dough dries out very quickly if you don’t.


Links:

Link to Amazon for a detailed description or to buy:

Marcato Atlas Wellness 150 Pasta Machine:


Video by Marcato the manufacturer, how to use:
Atlas Wellness 150 directions for use and cleaning

Video by Cooks Illustrated,
How to Make Fresh Pasta (Homemade Fettuccine) Using the Marcato Pasta machine:


Monday, June 12, 2017

Buying from Amazon

Have you ever noticed that when you look at a product on Amazon that you’d like to buy, noted the price, but don’t want to buy right then instead wanted to think about it for a few days? Then the next time you look and are ready to buy the price is higher! I find this to be common. Case in point is the pasta machine I just purchased.

  • The pasta machine when the first time I looked was $69.00

  • I went back to buy a week later and it was $70.00

  • I went back another week later and it was $73.00

  • Also, the machine is offered in seven different colors. I really wanted the Candy Red but the price for a colored unit over the polished stainless unit was at Amazon and multiple other sellers a $129.00, that’s just not going to happen for me!

I finally decided to order the polished stainless machine, but when I went to order it surprisingly it was back to $69.00. I also noticed they now offer the choice of colors for the same $69.00 (not $129.00)! So I have the Candy Red one on its way for $69.00 and free shipping! Should be here Thursday. Yippee!


Amazon in case you didn’t notice, saves your searches and to me appears to adjust the price higher to make a few more dollars and hustle you into buying at the new higher price! It also looks to me that Amazon (and WalMart) will soon put the brick and mortar stores out of business as they are growing very rapidly leaving us no other choice but to buy from these giants. We will soon have no choice and have to shop much smarter (other places or sources) to get the best honest prices.


Wednesday, August 5, 2015

5-Piece Cook Set from Bass Pro Shops

A couple years ago I sold my RV, a 26 foot Class ‘C’ Tioga Motor Home due to some major repairs that were needed and it just wasn’t worth repairing it. At this time I’m not planning to replace the RV so I need to downsize my Bug-Out Stuff and as I make changes I’ll share what I’m doing so you can see you don’t need much Bug-Out Stuff to be safe and comfortable.

Lately I’m doing much more economical mini-van camping and with that I’m back to cooking everything on a camp stove or campfire, it’s not a bad thing but a full size RV spoils you with being able to use full size kitchen gear.
So, I needed to buy some pots and pans to fit the camp stove. I found this set below from Bass Pro Shops that perfect for me. It’s made strong, nests together and I especially like the large pot @ 4.7 quarts because if I needed to boil drinking water or melt snow for water I could do a reasonable amount at a time.

The set:

Bottom view of the set:

The 4.7 quart large pot, note second handle for better control of a full pot:

The storage bag for the set:


Bass Pro Description: $49.99
The Bass Pro Shops® 5-Piece Cook Set is light and compact, yet comes with lots of options for cooking up a gourmet outdoor dinner. Made of sturdy aluminum, this Bass Pro Shops camping cookware set comes with 2 pots with lids, a frying pan, and a handy nylon carry bag. All the cookware features silicone-coated, folding handles and abrasion- and stick-resistant Quantum 2® coating for easier cleanup. When it's time to pack up, the nesting design keeps everything compact. The 42 oz. Bass Pro Shops 5-Piece Cook Set includes a 4.7 quart pot, a 3.2 quart pot, 1.6 quart fry pan, and 2 lids.

Lightweight aluminum is ideal for campfire cooking
4.7 quart pot and 3.2 quart pot
1.6 quart frying pan
Silicone-coated, folding handles
Quantum 2 nonstick coating makes cleanup easy
Compact nesting design
Includes nylon carry bag

Weight: 42 oz.

Friday, October 3, 2014

Kitchen Timer That Really Works


I have been looking for a kitchen timer that made sense to use in a kitchen and has an alarm that is really loud.

I have spent a lot of money over the years on timers looking for one who's alarm is loud. All have turned out to be just cheap junk and the volume of the alarm has always been extremely weak. Myself being a design engineer, I swear the designers of kitchen timers never baked or cooked anything in a kitchen. An engineering lab is quiet and does not replicate a true kitchen environment.

Last year I purchased all new GE Profile kitchen appliances and the timer on the microwave and the oven are barely audible when standing next to the appliance. What junk GE produces. I had the repair people out twice for each appliance, they replaced the mother boards on both but no increase in alarm volume. They said there's nothing they can do it is what it is. More on these junk appliances in another posting. Oh and by the way GE has sold its entire appliance line to a foreign company. Imagine that!

Anyway back to the timer:
My kitchen like most is noisy, grain mill grinding, TV on, vent fan roaring, people talking and many times I go the computer room which is three rooms and a hallway away from the kitchen to work on the recipes. I need a loud alarm! Also there are times while the food is in the oven I leave the kitchen to even work in the garage for a few minutes so I need a timer I can take with me.

This timer has 4 loudness settings from normal, a little louder, to loud, to really loud at 110 decibels. 110 decibels is like having your riding lawn mower running in your kitchen!!!

This is an outstanding kitchen timer! :-)


Seller Comments:

Extra Big & Loud Digital Kitchen Timer
Looking for a timer you can hear from a distance, over other noise or from another room? This super easy to use yet feature rich timer may be just the ticket. There is nothing flimsy about it. It's solidly built for demanding commercial kitchen use. Should provide many years of reliable service.
Here at Breadtopia, we've tested and used many timers over the years. Guess which one is stuck to our stove vent hood by its handy magnet? Guess which one we reach for all the time? You guessed it. This is our all time favorite timer. 
Quick and easy to set
One button volume setting - 4 levels to 110 db
Large and clear number display
Set for up to 100 hours
Count down and count up timer
Highly water resistant (just don't take it scuba diving)
Robust rubber keypad
Memory recalls last setting
Powerful magnets on back
Flip out stand
1 9v battery and instructions included
Dimensions: 3.5"W x 5.1"H x 1.1"D

Website store link:

Cost $29.00


Monday, September 29, 2014

Equipment Review: Best Stand Mixers


Buying a stand mixer can be expensive, then add to that the uncertainty of how well the mixer actually performs can make you queasy. The only information you can go by is the manufacturers propaganda or personal biased reviews that are not truly comparison reviews because they only deal with one brand.
I found this comparison test while looking through my favorite cooking magazine "Cooks Illustrated" (you need to buy a subscription) and TV show "America's Test Kitchen". I think you will find it helpful mixer if you are planning the purchase of a stand mixer. They explain and test the needed capabilities of a stand mixer.


The Test:
Published on Oct 1, 2013

Video of the Test:
Also at this link are dozens more tests of various kitchen equipment you may want.

Read full testing details on Cook's Illustrated: http://bit.ly/19fn0BO
Buy our winning stand mixer: http://amzn.to/1pG9hat

A stand mixer is one of the most expensive appliances in your kitchen, so it had better do it all—from whipping a single egg white to kneading thick pizza dough. We ordered nine models, priced from nearly $230 to a jaw-dropping $849, to find out which one performed best.

Products tested (listed alphabetically):
Bosch Universal Plus Mixer
Breville Scraper Mixer Pro
Cuisinart 5.5 Quart Stand Mixer
Cuisinart 7.0 Quart 12-Speed Stand Mixer
KitchenAid Classic Plus Series 4.5-Quart Tilt-Head Stand Mixer
KitchenAid Pro Line Series 7-Qt Bowl Lift Stand Mixer
KitchenAid Professional 600 Series 6-Quart Bowl-Lift Stand Mixer
Vollrath 7-Quart Countertop Commercial Mixer
Waring Commercial Professional 7-Quart Stand Mixer

About America's Test Kitchen:
America's Test Kitchen is a real 2,500 square foot test kitchen located just outside of Boston that is home to more than three dozen full-time cooks and product testers. Our mission is simple: to develop the absolute best recipes for all of your favorite foods. To do this, we test each recipe 30, 40, sometimes as many as 70 times, until we arrive at the combination of ingredients, technique, temperature, cooking time, and equipment that yields the best, most-foolproof recipe.

Each week, the cast of America's Test Kitchen brings the recipes, testings, and tastings from Cook's Illustrated magazine to life on our public television series. With more than 2 million viewers per episode, we are the most-watched cooking show on public television.

http://www.americastestkitchen.com

More than 1.3 million home cooks rely on Cook's Illustrated and Cook's Country magazines to provide trusted recipes that work, honest ratings of equipment and supermarket ingredients, and kitchen tips.

Friday, September 5, 2014

Pizza Pan Tested in a Coleman Camp Stove Oven


I think I have found the ideal baking sheet pan for the Coleman Camp Stove Oven. A 10 inch pizza pan. During my trial baking's I found that the oven needs the heat that comes from the bottom of the oven to circulate throughout the oven chamber to also brown the top of whatever your baking. For example two standard bread pans side by side will just fit but they block the heat circulation and restricts the heat rise to the top of the bread. Even though the bread is baked correctly the bread didn't brown properly and just doesn't look right. But by baking with only one bread pan in the oven the heat circulated properly and the top of the loaf did brown properly.

So back to the pizza pan. Being round it naturally leaves fairly large open corners for the heat to flow through to the top of the oven and do its browning job.

The pizza pan is not only for making just pizza but also biscuits, rolls, bagels, soft pretzels, cookies and just about anything you would bake on a cookie sheet pan.

I purchased three, 10 pizza pans as I will need them for a standard batch of cookies, bagels and pretzels. The three pans should handle most cookie batch sizes.


The new 10 inch pizza pan in the oven.


Here are some pretzel buns I baked in the oven a couple days ago. They browned top and bottom perfectly.


The name of the pizza pans:
"American Metalcraft CTP10 10" Coupe Pizza Pan - Standard Weight Aluminum"
Price: $3.19/each


Here's the link to the restaurant supply house. They also have everything you could ever want for food prepping.


Saturday, April 26, 2014

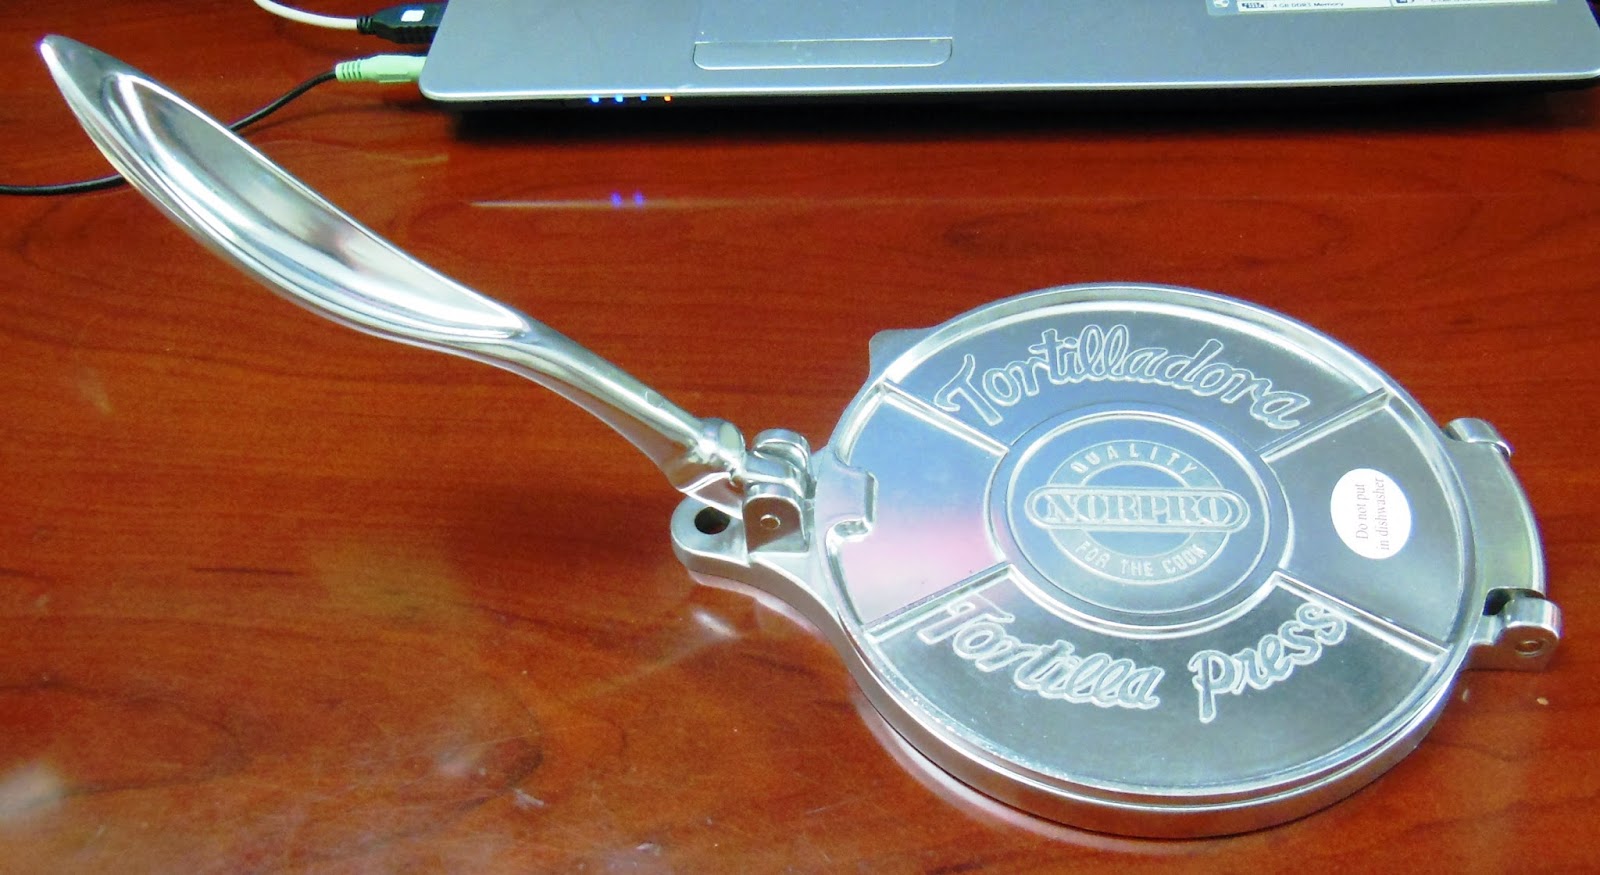
Tortilla Press


The foods I choose to bulk store for eating during disaster events need to be simple and be cooked on a camp stove or campfire. Tortilla's are one of them.

You can use a rolling pin to roll out the tortilla but a tortilla press makes it so easy and makes each of them a uniform thickness. If you were in a tent or some other minimal shelter you may not have a rolling pin or a flat surface to use it, then the Tortilla Press is the answer, easily making the thin Tortilla.

I purchased my press through Amazon for $13.00 it is a 6 inch diameter size. I  recommend you consider the optional 8 inch diameter press then should you want a larger tortilla you have the press for it. This Norpro press is precision made of die cast aluminum, nicely finished and a well built kitchen tool.


This is the very first time I tried to make my own Tortillas. I don't care much for Mexican food so I don't eat them often. If I do I've always purchased them from the supermarket. It was time for another cooking test for making survival meals and I have to say these are just to easy to make.


To test this press and alternate flours I made Tortilla's using the 5 following flours:

Masa Harina Flour:
Makes the best Tortillas and is the easiest to use.

White All Purpose Flour:
Works very well and makes great Tortillas.

100% Whole Wheat Flour:
Works very well. Especially for the fact I have wheat grain in storage I will always have the ability to make Tortillas.

Cornmeal:
Will not form a dough at all. It should not be considered as a possible substitute.

Cornmeal Re-Milled with gluten added:
I ran the cornmeal through my flour mill to mill it finer and also added gluten to it and it still will not form a dough. It should not be considered as a possible substitute.


Masa Harina Flour Tortillas.


All Purpose White Flour Tortillas.


100% Whole Wheat Flour Tortillas.


Recipes I Used:
Makes 10 (5 inch) Tortillas

Masa Harina Corn Tortillas
  • 2 cups Masa Harina
  • 1 1/3 cups water
  • 1 tsp salt

All Purpose White Flour
  • 2 cups All Purpose Flour
  • 1 cup water
  • 1/3 cup oil
  • 1 tsp baking powder
  • 1 tsp salt

100 % Whole Wheat Flour
  • 2 cups Whole Wheat Flour
  • 1 1/2 cups water
  • 1 tbs gluten (optional)
  • 1 tsp salt

Directions:
  • Blend together all the dry ingredients.
  • Then add liquids and mix until a dough forms. You can add more water or flour at any time if needed to make a pliable dough.
  • By hand shape the dough into a log about 1 inch in diameter and divide into 10 pieces.
  • Using your palms form each of the 10 pieces into a ball.

Using the Press:
  • You will need to use parchment paper to keep the dough from sticking to the press's metal plates.
  • Lay a piece of parchment on the bottom plate, then the dough ball, then the other piece of parchment paper on top the dough ball.
  • Close the press to squeeze the dough thin.
  • Open the press and remove from the press.
  • Peel the dough off the parchment paper. The dough peels of very easily.

Cooking:
In a dry medium-high heat fry pan cook each side of the Tortilla for about a minute or so or until brown spots appear on the dough. Very simple!


Summary:
The Tortilla press is a great addition to any kitchen.
Tortilla making is a simple and very quick process. The only issue to be aware of is dividing the dough into pieces. The 2 cup recipes above produce 10, 5 inch Tortillas. My press is only a 6 inch press, I recommend the 8 inch in case you want a larger Tortilla plus you can always make 5 or 6 inch ones in the 8 inch press. Although the 5-6 inch ones are fine for me.

Dough ball size is the only thing to try and keep uniform. A small ball and the Tortilla will be smaller in diameter, a large ball and the dough will squirt out beyond the press plate edges. You would then have to trim the excess and reform the trimmings into a ball again.